Thursday, September 26, 2013

French Toast

With a vast array of breakfast options set out before you at a restaurant, what do you most often choose? Waffles? Pancakes? Omelets? Something called a wolf pack? Or maybe you're just a traditional eggs, bacon and hashbrown person. For me, it just depends on my mood. But what's my favorite breakfast to make at home? Also, it should be noted, one of the easier ones to accomplish?

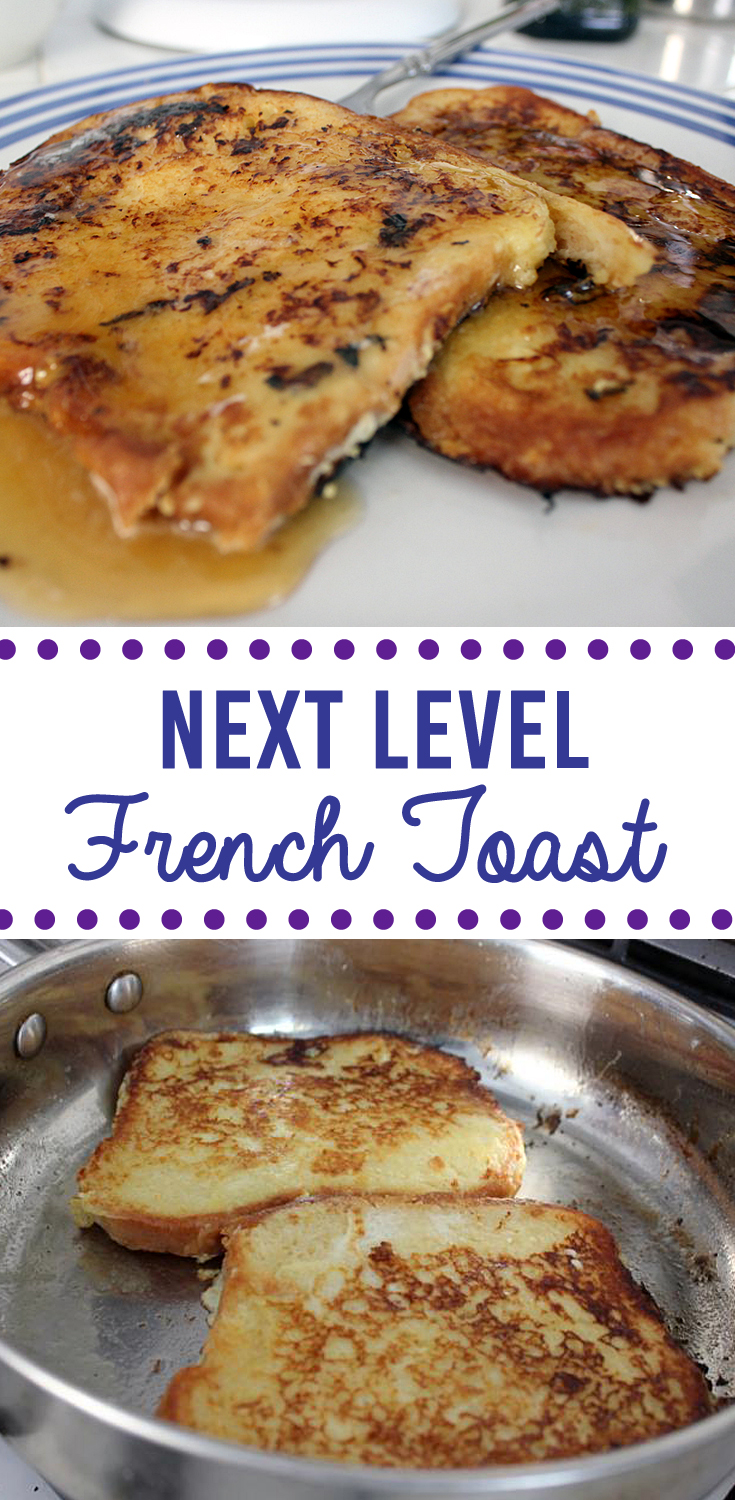
French Toast. The delightful eggy bread concoction that can be sweet OR savory! Sweet AND savory?! No matter your preference, you have to admit, french toast is pretty great. And this french toast? Wow. It's just your basic recipe, really, but damn is it good! I think that little bit of honey in the mix really makes it awesome.

Also - why is french toast called french toast? It is supposedly not necessarily originally a piece de resistance of France. Mysterious!

French Toast by freshfromthe.com

French Toast by freshfromthe.com

Don't just make French toast with eggs and milk whisked together - make it next level with this simple recipe that adds just a few more ingredients!

Ingredients:
  • 1 cup whole milk
  • 3 large eggs
  • 2 Tablespoons honey, warmed in microwave for 20 seconds
  • 1/4 teaspoon salt
  • 3-4 Tablespoons butter
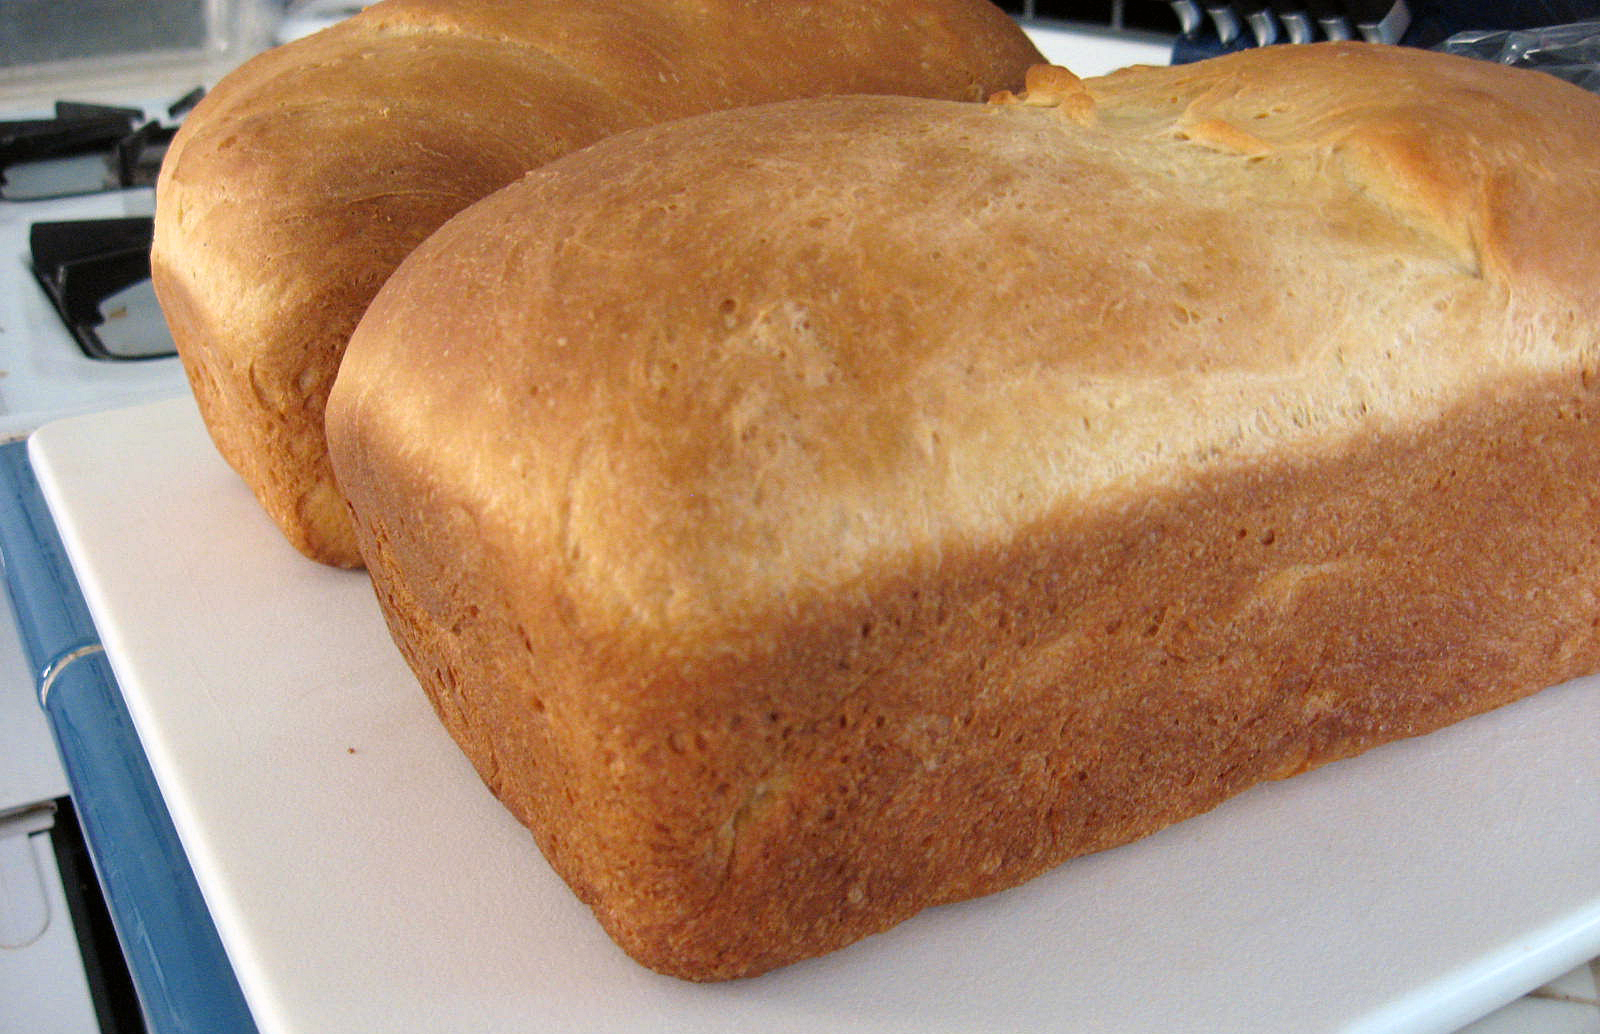
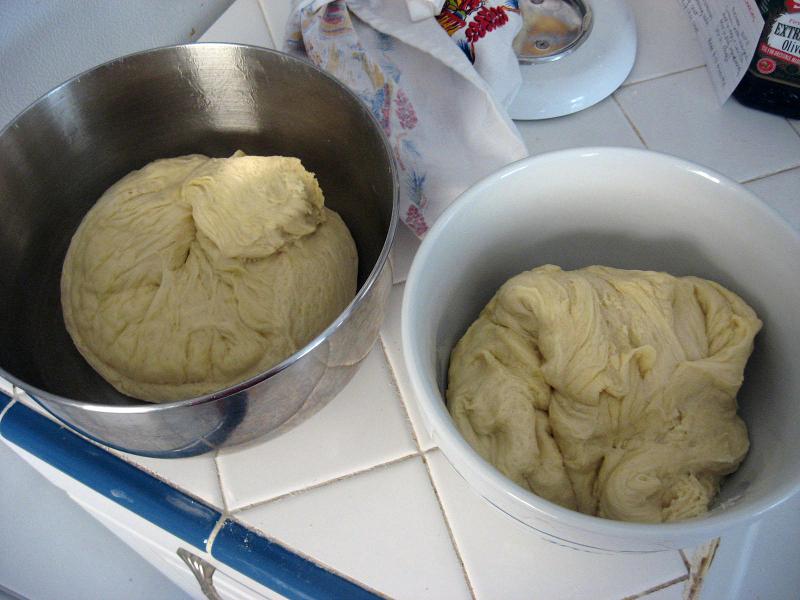
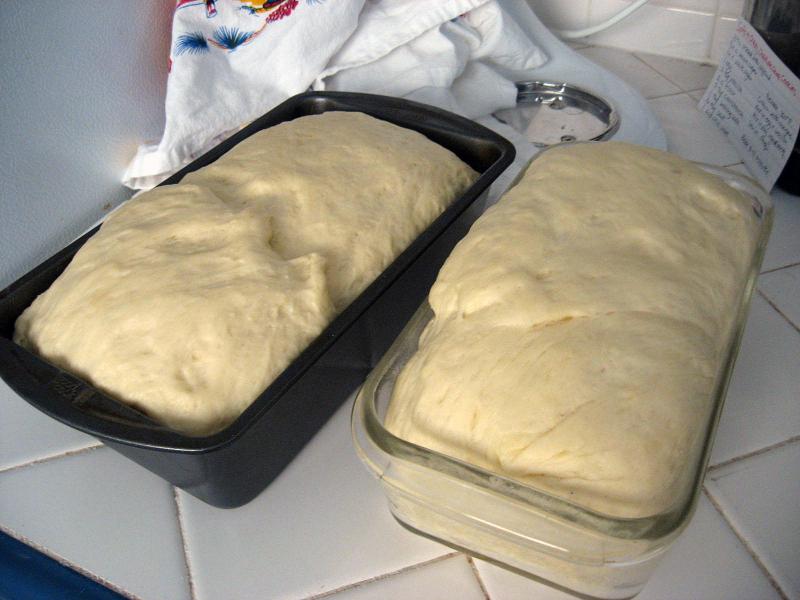
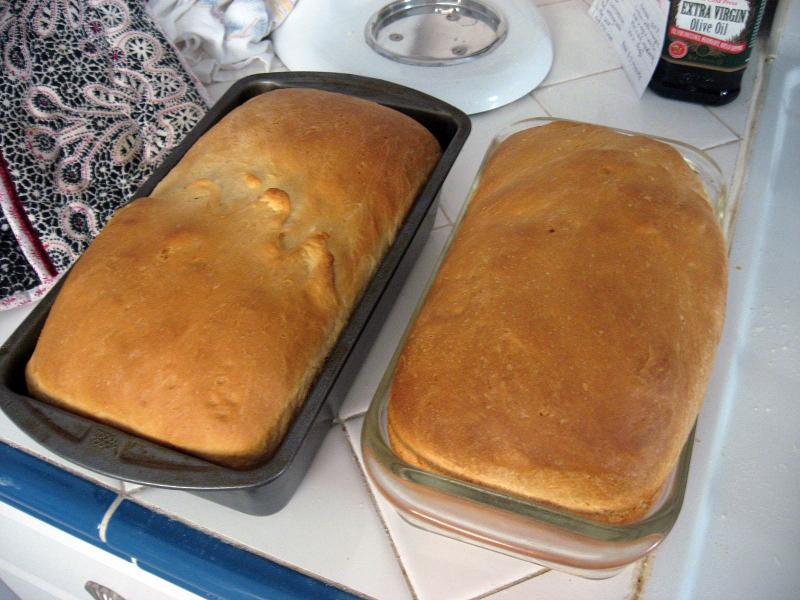
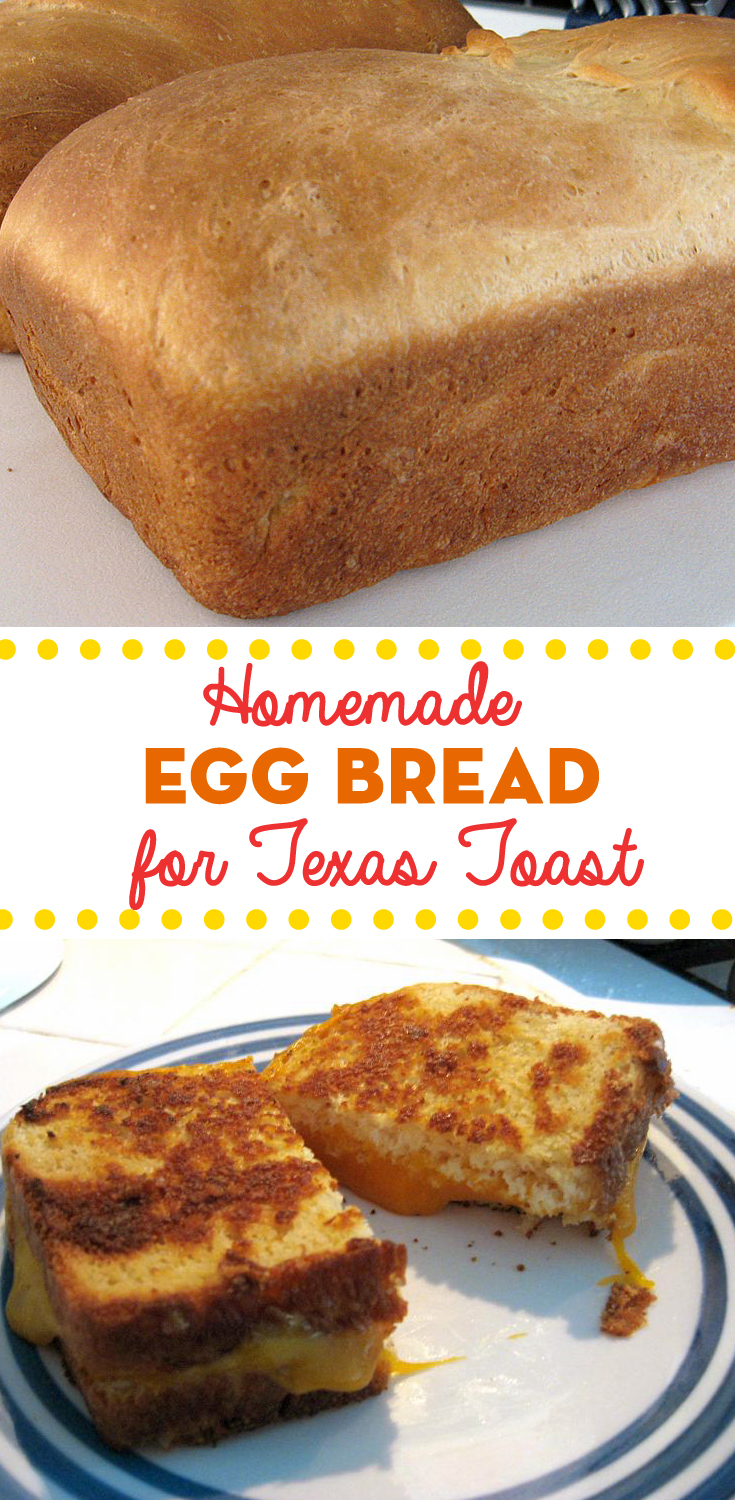
  • Day old or stale bread a la Egg Bread or Challah Bread
Instructions:
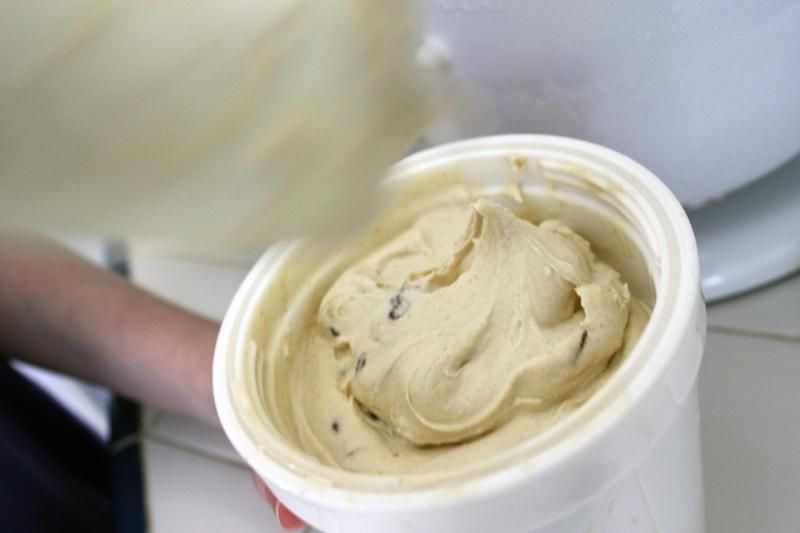
  1. In a mixing bowl, whisk together the milk, eggs, honey and salt. You can do this ahead of time and keep in the fridge if you want to be ready the night before. When you're good to go, pour the mixture into a pie pan. Dip your bread into the mixture, allowing each side to soak for 30 seconds.
  2. Over medium-low heat, melt 1 Tbsp butter in a saute pan. Nonstick is great if you have it, if you don't you'll still be okay. Place 2 slices of your bread at a time on the pan and cook until golden brown, about 2 to 3 minutes per side. If you're doing thick bread, you may want to press down on it a bit to make sure the middle gets cooked through. Set aside until you have all of your pieces done (probably between 6-8 slices depending on thickness and type of bread). Serve immediately with toppings of your choice - maple syrup, whipped cream, fruit, or even ice cream if you're so inclined!
Recipe adapted from Alton Brown
In photos:


 You'll want some thick slices of bread to start. This is homemade egg bread - and dang, some homemade bread just makes this all the more succulent! Preheat your oven at this point if you want to keep your finished toast warm while you make the rest.


Soak your bread in your egg mixture, about 30 seconds per side.


Add some butter to your skillet and plop that bread on there. A non-stick skillet would be easier to use, but I don't have one, so I made do with a stainless steel one instead.


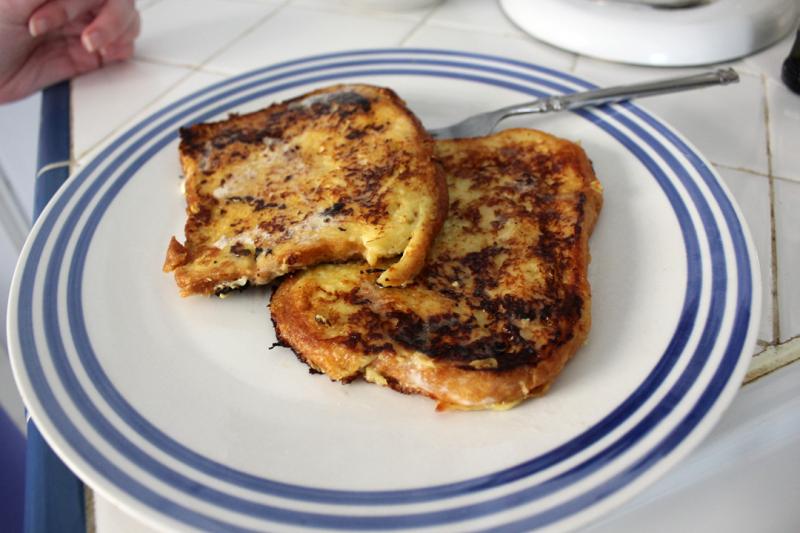
You can fit two pieces of bread in the skillet usually. cook each side for about 2 minutes and flip! You'll see it's browned like so.


How can you tell if the bread has cooked through? Generally what I do is press down with my spatula, and if any liquid oozes out of the top, it's not cooked through quite yet.


Stick them in the oven to keep them warm until you're all done with the rest. Obviously this is optional, but why would you want your toast to get cold?


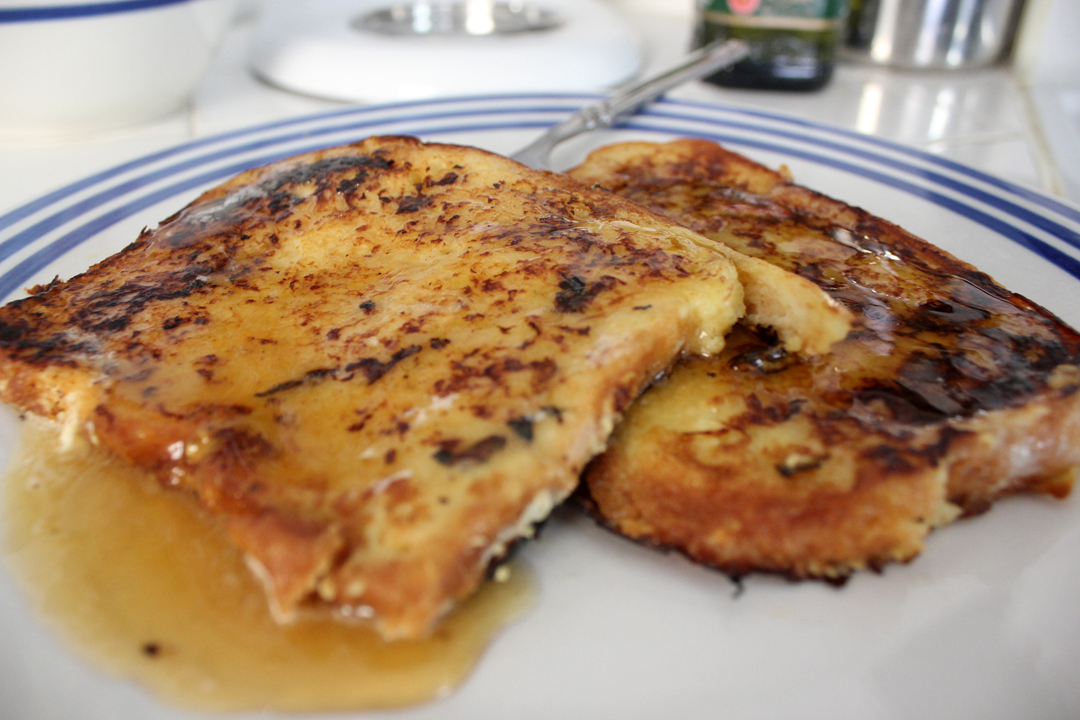
Once you're ready, butter that toast up!


Pour on your syrup!


Oh yeah.


Go to town on that stuff! Let your drool mix in with your syrup, I don't mind.

Sunday, September 22, 2013

Butter Pecan Ice Cream

You'd think the height of summer would be the time for delicious ice cream recipes, but apparently that's not entirely the case around here! Though, admittedly, it was much hotter the last few weeks in ole Los Angeles than the entirety of the previous summer months, so maybe it's not so backward after all.

Butter Pecan Ice Cream by freshfromthe.com

In any case, it was worth the wait. Because this butter pecan ice cream is pretty much crazmazing. That's crazy amazing, for those who don't know. I can make up words, it's okay. I gave myself permission.

Though I don't have an actual butter pecan ice cream experience to compare this homemade version to, as I will always gravitate toward a cookie dough or vanilla bean variety if I'm buying a tub or getting some at an ice cream place, I am assured this tastes just the same as one you'd get at some fancy schmancy place. To me, it tastes like heaven regardless of a lack of comparison. Like, probably the best ice cream I've made yet.

I swear, I'm not exaggerating. But also, I actually used half and half and whipping cream and didn't substitute milk for any of it, so that may have made a difference. You want creamy goodness, use the dang ingredients it calls for!

Butter Pecan Ice Cream by freshfromthe.com

Butter Pecan Ice Cream

Ingredients
  • 1/2 cup toasted pecans
  • 1 Tablespoon salted butter, melted
  • 3/4 cup brown sugar
  • 3 egg yolks
  • 1 1/2 cups half and half
  • 1/2 cup whipping cream
  • 1 teaspoon vanilla extract
Cooking Directions
  1. If you want, you can buy raw pecans and bake them in your oven, then chop them up and mix with the butter. Or you can go the easy route like me and buy pre-toasted and chopped and just mix them up with the melted butter. So much less time, seriously. Set aside for now.
  2. Meanwhile, you want to separate your eggs and keep the yolks for this recipe. You can save the whites for another recipe or scramble them up for some scrambled egg whites. Or you can just throw them away, but that seems like a waste. In any case, whisk up your egg yolks and the brown sugar together until they're mixed together well. Keep these at the ready for now.
  3. Combine the half and half and the whipping cream in a saucepan over medium heat. Heat this until it comes to a simmer, but don't let it boil.
  4. Lower the heat and add a few spoonfuls of this to your egg/sugar mixture, whisking constantly so the eggs don't cook. Then slowly pour this tempered egg mix into the saucepan. Whisk this mixture constantly while keeping it at a low simmer, until it is thick enough to coat the back of a spoon. This should take about 4 minutes. Again, no boiling!
  5. Remove from heat and stir in the vanilla.
  6. Cover the top of this mix with saran wrap and let cool completely in the fridge for about six hours, or overnight. Overnight is always best. If you're using the mixing bowl attachment for your mixer to make this, make sure that thing's also in the freezer overnight on the coldest setting! Important!
  7. Freeze ice cream according to the manufacturer's instructions. When you have about a minute left, fold in your pecans.
  8. Serve immediately for soft serve style, or pack the ice cream into an airtight container and stick in the freezer until firm. I just bought one of these ice cream containers, and already love it!
  9. Scoop 'er up and omnomnom that stuff!
(Adapted from Peaches and Cake)

In photos: 

 Whisk up your egg yolks and brown sugar. Set aside for now.

 Combine your half and half and your whipping cream in a saucepan and bring to a simmer. Not a boil, just a simmer!

Add a few spoonfuls of the milk to the egg mixture and whisk to combine. This is to temper the eggs so they don't cook. You don't want weird egg bits in your ice cream. After that, add it back to your milk mixture, and on medium-low, whisk constantly at a low simmer for about four minutes until it thickens.

You'll know it's good when it coats the back of your spoon.

See, you can run your finger down it, and the line stays there. It's ready!

Remove from heat and add in the vanilla. Now, cover that and stick in your fridge to cool completely for at least six hours. Best if overnight. I always stick a piece of saran wrap directly on the top of the liquid so it doesn't get a film on top.

When it's cooled, then you can put it in your ice cream maker. Follow the instructions on your particular maker and get it to churning. Mine took about 15-20 minutes to churn, and then it looked like this.

Butter Pecan Ice Cream by freshfromthe.com
Scrape it off of there and then mix in your prepared pecans. Alas, I forgot to take photos of the pecans!

Scoop that into your freezer safe container.

Mine filled up the "pint" size Zak Designs ice cream container, with a little bit left over.

This is even a little bit too full for that container, but that's okay, just eat some off the top before you put the lid on and stick it in the freezer! Problem solved!

Butter Pecan Ice Cream by freshfromthe.com
After you've had it in the freezer a while, it will set up like regular ice cream. You can then scoop to your heart's content! Or just eat it directly out of the container. You know I do that.

Tuesday, September 17, 2013

Macaroni and Cheese

I once went through a phase as a child where I would only eat macaroni and cheese. I don't really remember this phase much other than I got sick and ended up having to take some weird medicine that tasted like chalk.

Homemade Macaroni and Cheese by freshfromthe.com

Nonetheless, my love of macaroni and cheese did not diminish. In fact, I still love it to this day, grown up adult or not. I'm not sure why it's acceptable to like fettucini alfredo as an adult and not get one of those "oh you're such a kid at heart" looks when it's basically the same thing as macaroni and cheese with just a different pasta and type of cheese sauce. Come on people, don't make the mac and cheese lovers feel bad. You know you secretly love it too!

A lot of kids, on the other hand, sadly will not deign to try non-Kraft varieties of macaroni and cheese. To which I say: silly kids! True, the boxed macaroni is good (though I will argue that now I prefer the Trader Joe's variety to Kraft! Truth!), but if you like mac and cheese at all and are still skeptical about home varieties, I urge you to give this one a go. I really don't think you'll regret it.

You'll eat it and you'll like it! I command it so!


Macaroni and Cheese

Ingredients
  • 4 cups dried macaroni
  • 1 whole large egg, beaten
  • 1/4 cup butter
  • 1/2 cup all-purpose flour
  • 2 1/2 cups whole milk
  • 1 pound sharp cheddar cheese, grated
  • 1/2 teaspoon salt (more to taste)
  • 1/2 teaspoon ground black pepper
  • Bread Crumbs (a la Panko)
  • Optional other spices: season salt, cayenne pepper, paprika, thyme
Cooking Directions
  1. Cook macaroni until very firm - too firm to eat right away. Generally a minute or so less than the time listed on the packaging. Make sure to douse in cold water to stop them cooking once you drain. Set aside for now.
  2. In a small bowl, beat your egg. Set aside for the moment.
  3. In a large pot, melt butter and sprinkle in flour. Whisk together over medium-low heat. Cook this for five minutes, whisking constantly. You don't want it to burn.
  4. Pour in the milk and whisk until smooth. Cook for another five minutes until very thick, then reduce the heat to low.
  5. Take 1/4 cup of the sauce and pour into the beaten egg, whisking constantly to avoid cooking the egg. This is called tempering, and is done so you don't end up with scrambled egg bits in your sauce. Whisk until smooth.
  6. Pour this egg mixture into your sauce, whisking constantly. Stir until smooth.
  7. Add in the cheese and stir to melt. Leave some cheese out to top later.
  8. Add in the salt and pepper. Taste and add in more salt as you like. Don't be shy!
  9. Mix together with your cooked macaroni, stirring to combine into mac and cheese deliciousness.
  10. You can serve this now if you want, but no! Instead, you should preheat your oven back up at the beginning of all this to 375F and pour your mac into a buttered baking dish, top with the bread crumbs and extra cheese on top, and bake for 20-25 minutes until the crumbs have browned a little and the extra cheese is bubbly and golden. Go for it!
(Adapted from The Pioneer Woman)

In photos:


  Boil that water! Boil it all up! Also, preheat your oven to 375F if you're going to bake the dish - which you totally should!


 In go four cups of elbow macaroni. Cook those about a minute under what the packaging says you should.


Shred the cheese! One pound of sharp cheddar, if you please.


Drain the macaroni, douse with some cold water to stop it cooking, and set it aside for now.


In a good-sized saucepan, melt your butter and sprinkle in your flour, whisking to combine. Keep whisking that over medium-low heat for six minutes. You whisk to not let it burn! No burning allowed!


Pour in your milk. Cook for another five minutes, whisking intermittently.


In a small bowl, beat an egg. Sloooooowly add in 1/4 cup of the milk mixture, whisking constantly. Temper that egg so it doesn't cook through!


Add the egg mixture into your milk, whisking constantly until smooth. Now for the best part...


Dump in the cheese, man! Dump it in! But leave a little bit out to sprinkle on the top later.


Stir and stir and stir that cheese. Melting action! Once melted, mix in your salt, pepper and any additional spices you may want. Taste test that stuff - you don't want it to be undersalted.


Pour that into your macaroni! I did mine in a Le Creuset pot to bake in the oven. You can also do this in a 9x13 baking dish.


I mean. Yum.


Now if you want, you can stop here and call it a day. It's perfectly good to eat at this point - but don't you want to make it perfectly awesome to eat?


I know you do. You're going to want some of this action. OR, if you're feeling really adventurous, you can crumple up some potato chips instead. Gives it a fun crunch.


Sprinkle on the bread crumbs, yes yes yes. I probably used a half cup. You'll use more if you're doing a 9x13 pan. That's more surface area than something this deep. Math!


Remember that cheese you saved earlier? Now it gets to go on top of the bread crumbs! Melty top goodness is coming!


That baby's ready to go into your 375F oven for 20-25 minutes until the cheese is all melted.


Oh boy, oh boy, it's ready!!


So ready! You can add more cheese on top if you want, too. I just didn't save more than that. Silly me.


Scoop yourself a portion and dig in!

Thursday, September 12, 2013

Homemade Egg Bread for Texas Toast

Can I let you in on a secret? My other yeast breads that I've made have only turned out okay. Granted, I have not made that many yeast breads, rather many quick breads. Because damn, waiting around for things to rise is kind of annoying, right?

But this bread totally turned out! It rose like crazy. The best rise in a dough I've ever made! This makes it lighter with more air pockets on the inside, which is really what makes a bread a bread.

Homemade Egg Bread for Texas Toast by freshfromthe.com

That may leave you to wonder why I would make this bread. It seems kind of random, perhaps? Well, recently I went to Phoenix and had a sandwich, a sandwich my boyfriend would come to call the best sandwich he's ever tasted. And it was made using this Texas Toast-style bread. Now, this was not my all-time favorite sandwich because it had too much aioli sauce on it, but I did like the bread. Incidentally, if you ever want to try this sandwich and you happen to be in Phoenix, it's the BLT Revival at Tonto Bar & Grill.

(P.S., my favorite sandwich appears to be this fish sandwich I had at another place in Phoenix. OMG it was GOOD. And, sadly, they don't make it at the same restaurant here in LA! What! Quelle horreur! So, if you ever go to the Hillstone in Phoenix, try out the Gulf Coast Fish Sandwich. You won't regret it!)

Anyway! I made the bread, and we ate almost a whole loaf in one day, including making some grilled cheese sandwiches for dinner. I imagine it would be amazeballs when made into french toast, so maybe I'll have to get some maple syrup that hasn't expired and try that out with the remaining loaf!

Homemade Egg Bread for Texas Toast by freshfromthe.com

Delicious homemade egg bread, perfect for Texas toast, grilled cheese, and French toast.

Ingredients:
  • 6 to 7 cups all-purpose flour
  • 2 packages active dry yeast
  • 2 cups whole milk
  • 1/4 cup granulated sugar
  • 1/4 cup (1/2 stick) unsalted butter
  • 2 teaspoons salt
  • 3 large eggs
Instructions:

  1. In a large mixer, combine 3 cups of flour with the yeast. Leave that while, in a saucepan, you heat up the milk, sugar, butter and salt until warm and butter is almost all melted, stirring constantly. Mix this in to the flour mixture, then beat in your eggs one at a time on low speed for about 30 seconds each, scraping down the sides of the bowl when necessary. Beat this mixture on high speed for 3 minutes, then stir in as much of the remaining flour as you can with a spoon (probably around 3 cups).
  2. Onto a lightly floured surface, knead the dough, adding in the last cup of flour (or so) until the dough is semi-stiff, smooth and elastic. Should take around 6 minutes. Shape this into a ball and place in a lightly buttered large bowl. Turn the ball over once to butter all sides of it. Cover with a towel and let rise in a warm place until doubled, which should take about an hour and 15 minutes. Make sure you keep it away from drafts, I usually stick this in a turned off oven.
  3. After it has doubled, punch it down and divide the dough in half. Cover again and let rest for 10 minutes. Shape into 2 loaves and place in 2 sprayed loaf pans. Cover one more time and let rise for 35 minutes until nearly double.
  4. Bake in a 375°F oven for 35-40 minutes, covering with foil for the last 15 minutes to prevent over-browning. Let cool in the pans for a few minutes, then remove to a wire rack to completely cool.
  5. Slice it up and do whatever you like - make some french toast, maybe some grilled cheese sandwiches, a BLT, or just butter it up and eat it as is!

Recipe via Just a Pinch

In Photos:


 Mix together 3 cups of flour with the 2 packages of active dry yeast in your mixing bowl.


In a saucepan, heat your milk, sugar, salt and butter until warm and the butter is almost 100% melted. You can see one little bit of butter left in the bottom right area. Done!


Mix your milk mixture into your flour mixture.


Beat in your 3 large eggs one at at time, about 30 seconds each. Then beat that for about 3 minutes on high.


Mix in as much of the remaining flour as you can with a spoon (about 3 cups for me).


Turn that out onto a floured surface and knead the last cup of flour in until the dough is semi-stiff and elastic, about 6 minutes.


Put your dough into a buttered bowl and turn over so both sides get buttered. Cover and let rise for 1 1/4 hours until doubled in a non-drafty place. Take out and PUNCH IT! I forgot to take a photo pre-punch to show you how much it grew. Trust me, it grew a lot!


Divide that dough in half and put in two bowls. Cover and rest for 10 minutes.


Then form loaf-shapes and stick them in the prepared pans (butter 'em up!). Cover and let rise again for 35 minutes until almost doubled.


Look how much they grew! Also, if you don't want a weird looking loaf, make sure you smooth out the tops, unlike that one on the left there. Stick this in your 375F pre-heated oven for 35-40 minutes, covering with foil for the last 15 to avoid too-brownness.


Take those out of the oven and voila - you have bread!


Apart from the slightly wonky top of the one loaf, this is probably the most successful yeast bread I've made! Look how tall!

Take them out of the pans and let them cool on a wire rack, then get to slicing!


We made some delicious grilled cheese sandwiches with the bread. Super rich, very yummy!

Psst! Hey you! You should totally go like my Facebook page. I'd love you forever and ever. Click and like: http://www.facebook.com/freshfromthe.com.