Showing posts with label bread. Show all posts

Sunday, April 5, 2020

Monkey Bread


Monkey Bread by freshfromthe.com.

True story: these photos were all taken with the iPhone 11 Pro, and I have to say they turned out pretty good. Portrait mode could be a game changer for bloggers who don't have the money to buy both a fancy camera (and learn how to use it) and a cellphone. Because honestly this looks pretty close to what I'd be able to do on a fancy camera with my basic skills, and the iPhone autocorrects the lighting as well, because it was fairly dark in the room too when I took these.

I promise, this isn't an ad for an iPhone! I just was impressed and thought I'd share.

Monkey Bread by freshfromthe.com.

I've made another version of Monkey Bread on here before that is very similar to this version. There are a few key differences - this one you make all at once, whereas the other you let sit in the fridge overnight, this one uses rapid rise yeast, whereas the other uses active dry, and this one just has a plain glaze whereas the other one uses one with orange extract added. So, if the other version sounds better to you, head on over and check it out.

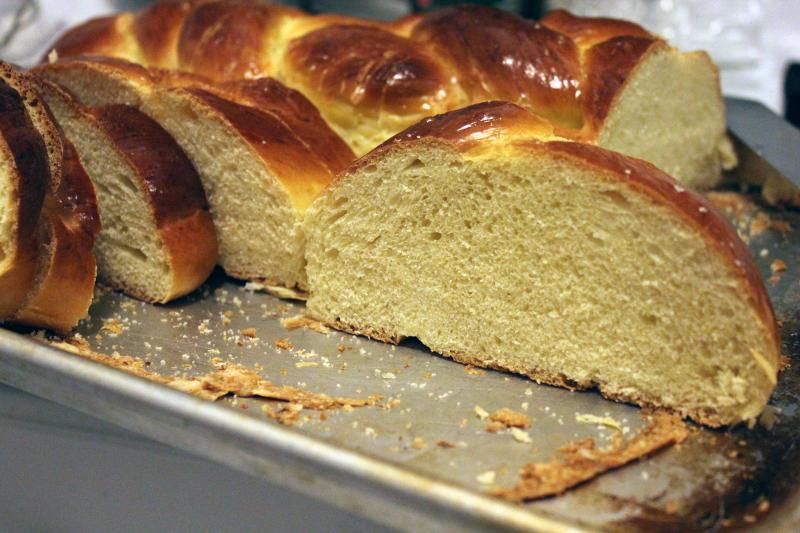
Also, you may be wondering - where is the glaze in these photos? I think I put it on too soon, and it just started to melt right into it, soooo oh well. It still looks awesome without it, right? Yes, of course it does.

Monkey Bread by freshfromthe.com.

But, I'm gonna keep this short, so you don't have to read a bunch of stuff before getting to the actual recipe, because I know how I hate that when I'm reading blogs.

Monkey Bread

A breakfast classic alternative to cinnamon rolls.

Ingredients:
    For the Dough
  • 2 Tablespoons unsalted butter, softened, plus 2 Tablespoons, melted
  • 1 cup warm milk (about 110 degrees F)
  • 1/3 cup warm water (about 110 degrees F)
  • 1/4 cup granulated sugar
  • 1 package rapid-rise or instant yeast
  • 3 1/4 cups all-purpose flour, plus extra for work surface
  • 2 teaspoons table salt
  • For the Brown Sugar Coating
  • 1 cup packed light brown sugar
  • 2 teaspoons ground cinnamon
  • 8 Tablespoons unsalted butter (1 stick), melted
  • For the Glaze
  • 1 cup confectioners' sugar
  • 2 Tablespoons milk
Instructions:

    For the Dough
  1. Adjust oven rack to medium-low position and heat oven to 200 degrees. When oven reaches 200 degrees, turn it off. Butter Bundt pan with 2 tablespoons softened butter. Set aside.
  2. In large measuring cup, mix together milk, water, melted butter, sugar, and yeast. Mix flour and salt in standing mixer fitted with dough hook. Turn machine to low and slowly add milk mixture. After dough comes together, increase speed to medium and mix until dough is shiny and smooth, 6 to 7 minutes. Turn dough onto lightly floured counter and knead briefly to form smooth, round ball. Coat large bowl with nonstick cooking spray. Place dough in bowl and coat surface of dough with cooking spray. Cover bowl with plastic wrap and place in warm oven until dough doubles in size, 50 to 60 minutes.
  3. For the Sugar Coating:
  4. While dough is rising, mix brown sugar and cinnamon together in bowl. Place melted butter in second bowl. Set aside.
  5. To Form the Bread:
  6. Gently remove dough from bowl, and pat into rough 8-inch square. Using bench scraper or knife, cut dough into 64 pieces.
  7. Roll each dough piece into a ball. Working one at a time, dip balls in melted butter, allowing excess butter to drip back into bowl. Roll in brown sugar mixture, then, following photo 4 below, layer balls in Bundt pan, staggering seams where dough balls meet as you build layers.
  8. Cover Bundt pan tightly with plastic wrap and place in turned-off oven until dough balls are puffy and have risen 1 to 2 inches from top of pan, 50 to 70 minutes.
  9. Remove pan from oven and heat oven to 350 degrees. Unwrap pan and bake until top is deep brown and caramel begins to bubble around edges, 30 to 35 minutes. Cool in pan for 5 minutes, then turn out on platter and allow to cool slightly, about 10 minutes.
  10. For the Glaze:
  11. While the bread cools, whisk confectioners' sugar and milk in small bowl until lumps are gone. Using whisk, drizzle glaze over warm monkey bread, letting it run over top and sides of bread. Serve warm.
Recipe thanks to Cook's Country

Monkey Bread by freshfromthe.com.

Tuesday, November 8, 2016

Easy Homemade Pita Bread

Recipe for Easy Homemade Pita Bread by freshfromthe.com

Bread always seems very intimidating, doesn't it? All this kneading and rising and blah blah makes a person just want to go buy a loaf at the grocery. Pita bread seems especially daunting. How does one get a pocket inside a piece of bread? What is this magic? Surely I can't do it myself!

My friends, you are wrong. You CAN make pita bread yourself, and you will be downright amazed at just how much dang better it is than anything you can buy at the store. Like, whoa, I just wanted to eat all of it immediately, better. And it's pretty easy. For someone who hasn't made a lot of bread, I didn't really have many problems doing this. I suppose I have baked a bunch so I kind of have a certain instinct going on, but seriously? So easy. And delicious. Deliciously easy.

Recipe for Easy Homemade Pita Bread by freshfromthe.com.

I'll tell you what's also really fun - getting to watch them puff up in the oven. I was like how does this work, really? What will happen in there to make a pocket? Answer - puff up city. The puffing happens because of the water vapor creating steam and the high high heat being up next to the broiler. Magic? Maybe not. But it seems like it, right?

For this batch, I just used an upside down baking sheet because I was lazy and did not want to deal with getting the baking stone out from the cupboard. I'll have to try it another time on that and see if it makes any kind of difference. But these turned out so wonderfully, I don't know that it's even necessary.

So - go! Make pita bread! Eat it and love it forever!

Recipe for Easy Homemade Pita Bread by freshfromthe.com.

Homemade Pita Bread by freshfromthe.com

Homemade pita bread is about 1000 times better than store bought, and really very easy to make. Yum!

Ingredients:
  • 2 1/2 teaspoons dry active yeast
  • 2 teaspoons granulated sugar
  • 2 cups all-purpose flour
  • 2 cups bread flour
  • 1 1/2 teaspoons salt
  • 2 Tablespoons olive oil
Instructions:
  1. Mix together the yeast, sugar, and a 1/2 cup lukewarm water in a small bowl. Let sit for about five minutes until it gets foamy.
  2. Combine the all-purpose flour, bread flour, and salt in the bowl of a stand mixer fitted with the dough hook. Mix on low until blended. Add in your yeast mixture, another 1/2 cup water, and the olive oil. Mix on low until the dough forms a ball that pulls clear from the sides and bottom of the bowl. If that doesn't happen after about a minute, add another tablespoon of water.
  3. The moment the dough starts to pull clear of the bottom of the bowl, add another 1/2 cup water and continue mixing until it's all incorporated. The dough should feel tacky when slapped with a clean hand, but it shouldn't be very sticky. If it sticks to your hand, add more flour, a tablespoon at a time, until it feels right.
  4. Cover the dough with plastic wrap and let rise at room temperature until doubled in size, about an hour. OR you can let it rise in the refrigerator overnight. Note: It didn't really rise for me in the fridge. I took it out and let it sit for quite a while on the counter and it did eventually rise.
  5. Preheat your oven to 500°F, with a rack in the upper third. Place either a baking stone or an inverted baking sheet in the oven to preheat along with the oven.
  6. Roll the dough into 8 balls roughly the size of baseballs. Cover with a cloth and let rise until they are about the size of softballs.
  7. Roll out each dough ball to about a 1/4 inch thickness with a floured rolling pin on a floured work surface. Place one or two at a time on your baking stone or sheet and bake until puffed and cooked through, about 3 minutes. Serve immediately, or let cool.

Recipe via Michael Solomonov's Zahav: A World of Israeli Cooking Cookbook

Recipe for Easy Homemade Pita Bread by freshfromthe.com.

Thursday, October 23, 2014

Brioche Buns

Recipe for Brioche Buns by freshfromthe.com

Homemade bread is not always the easiest beast to tackle, and certainly not for those who lean impatient. When you have to wait at least two hours before the stuff is even in the oven, that takes some patience and dedication. The recipe isn't really that difficult, though, so at least there's that! And after all of the waiting, the end result is definitely just what we were hoping for, for once. Let that dough rise, and rise, and rise, seriously! You want it to be nice and light and full of air pockets, right? Right!

Ours also took longer because we had put all 8 rolls on one pan initially, which would've meant they baked into each other rather than forming nice separate buns, and separating them onto two pans meant they got deflated, so we had to let them rise again! Yes, lots of rising time for us. I put in my instructions to separate them onto two pans, but if you don't care about them touching, go ahead and leave them on one pan.


These buns are ostensibly meant for burgers, which you can see a photo of below, but I will say we definitely ate some straight out of the oven (after cooling, duh), and they were bready goodness. Of course, I love myself a good bread, so you will be hard-pressed to find me turning down any kind of bread product. Anyway, yes, slice them up and turn them into burgers, or BLTs, or perhaps even just a nice turkey sandwich. The burger below has a beef patty, bacon, cheddar cheese, caramelized onions, romaine lettuce, a mayo/ketchup sauce, and it would have had pickles as well, but apparently we got a bottle that was not properly sealed so.. no pickles for us. But still, this burger was rich and, dare I say, decadent, in no small part to the addition of the homemade bun. I mean, SO much better than one you just buy at the store in a plastic bag.


What I really discovered in the making of these buns was the power of the dough scraper. I got one last Christmas and I'm not sure if I've used it since then, but I can tell you it was definitely a lifesaver with these buns! The initial recipe didn't say to spray the bowl before putting your dough back in to rise, and it would've been a sticky issue if not for the power of the dough scraper. Super handy! You can also use it to help in your kneading process as well, by scraping any sticky bits off your counter/cutting board/whatever you use and then slapping that dough back onto it. That way, you don't have to add quite as much flour, which is important. I would also recommend getting a good thermometer for when you put your yeast in the "warm" milk/water situation. Ours took a bit longer to foam up, but I'm not sure if it's because the liquid was too hot or too cold. So temperamental, that yeast!

Brioche Buns by freshfromthe.com

Burgers are always better with homemade buns, so if you’re feeling particularly ambitious, give these a try!

Ingredients:
  • 3 Tablespoons warm milk
  • 2 teaspoons active dry yeast
  • 2 1/2 Tablespoons granulated sugar
  • 2 large eggs
  • 3 cups bread flour
  • 1/3 cup all-purpose flour
  • 1 1/2 teaspoons salt
  • 2 1/2 Tablespoons unsalted butter, softened
  • sesame seeds (optional)
Instructions:
  1. In a glass measuring cup, or a bowl, combine one cup warm water, the milk, yeast and sugar, and let stand for about five minutes, until foamy. While that's going on, beat one egg. It's best if warm = 105-110°F.
  2. In a large bowl, whisk together your flours and salt. Rub the butter into the flour with your fingers, making crumbs. Using a dough scraper (your new best friend), stir in the yeast mixture and beaten egg until your dough forms. Scrape that out onto a clean, well-floured surface and knead until smooth and elastic, about 8 to 10 minutes. The dough is going to be pretty sticky and messy, but try not to add too much extra flour or your buns won't be quite as light. Some is fine, just not a lot.
  3. Shape the dough into a ball and return it to the bowl. You can always spray your bowl with some non-stick spray to prevent it sticking to the sides here as well. Cover that with some plastic wrap and let it rise in a warm place until it has doubled in size, which can take one to two hours. Some tips on rising below.*
  4. Line two baking sheets with parchment paper. Using your handy dandy dough scraper, divide the dough into 8 equal parts. Gently roll each into a ball and arrange on your baking sheets, 4 to a sheet, so they can be 2-3 inches apart. Cover loosely with plastic wrap coated in non-stick spray and let those rise in a warm place again for another one to two hours.
  5. Set a large shallow pan of water on your oven floor (this helps to keep the buns from getting too hard on the outside, I suspect). Preheat your oven to 400°F with your rack in the center. Beat the remaining egg with one tablespoon of water and brush that on your buns. You can sprinkle with sesame seeds here, if you so desire. Bake, turning your sheet halfway through baking, until the tops are golden brown, about 15 minutes. Transfer to a wire rack to cool completely. You can do one pan at a time here, as it's ok to let your second pan keep rising in the meantime.
*Okay, if you are having trouble with getting your dough to rise, here are a couple tips. One, you can try turning on your oven to its lowest temperature for a few minutes, then stick your dough in there. That may start to cook it just a little, so if you don't want to do that, another tip is to heat up some water in a saucepan, and stick that along with your dough in the oven. That gives it a little extra heat/moisture to get the rising process going.

Recipe via Smitten Kitchen


Thursday, May 1, 2014

Cinnamon Banana Bread with Crumble Topping

You know how you buy bananas sometimes, and then don't get around to eating them, and they become so ripe and soft that they seem inedible anyway? So you stick them in the freezer to use later, and then forget they're in there and eventually have to throw them away because they've gotten kind of gross? Well, don't let that happen! Use those babies for, you guessed it, banana bread. Seriously, why am I not making more banana bread?

Recipe for Cinnamon Banana Bread with Crumble Topping by freshfromthe.com

Here's the thing about banana breads - a lot of them have nuts in them. And, I don't know, I'm not the biggest fan of nutty breads. I would much rather have this dense, moist dreamboat with a, gasp, crumble topping. Did I just say crumble topping? You bet I did. The stuff dreams are made of. Seriously, what is not made better by a crumble topping? Pretty much everything is made better by a crumble topping, and this is certainly no exception. I mean, just look at it:


Right? But also? Dare I say that this bread tasted better the second day? It was good the first day, sure, but the second day it had seemed to absorb even more moisture and was pretty much amazing. And it stays that way for days after, not that it will last that long. Particularly not when you have some banana bread enthusiasts in the house. Great for a breakfast or a dessert. Get on it!

But? Just a tip - please make sure to use at least a 9 inch size bread pan when you make this. I used only an 8 inch and it, well, let's just say it had a bit of an overflow problem. Things were dripping to the bottom of my oven and burning up and it was just generally not good. The bread, however, turned out tasting just fine despite that, even though I had to bake it longer. But just avoid that in general and use a larger pan. End PSA.

Cinnamon Banana Bread with Crumble Topping by freshfromthe.com

A delightfully moist banana bread that goes over the top with a yummy crumble topping.

Ingredients:
    For the Bread:
  • 2 cups all-purpose flour
  • 1/2 teaspoon salt
  • 1/2 teaspoon baking soda
  • 1 teaspoon baking powder
  • 1 teaspoon cinnamon
  • 1 cup granulated sugar
  • 1 large egg
  • 1 teaspoon vanilla extract
  • 1/2 cup (1 stick) unsalted butter, softened
  • 1/2 cup buttermilk
  • 2 overripe bananas, mashed
  • For the Crumble Topping:
  • 1/2 cup powdered sugar
  • 1/2 cup all-purpose flour
  • 4 Tablespoons unsalted butter, melted
  • 1/2 teaspoon cinnamon
  • pinch of salt
Instructions:
  1. Preheat your oven to 350°F. Spray a 9-inch loaf pan with non-stick spray and set aside for now. In a medium bowl, whisk together the flour, salt, baking soda, baking powder, and cinnamon. Set aside.
  2. In the bowl of a stand mixer fitted with the paddle attachment, beat together the sugar, egg, and vanilla until combined. Add in the butter and beat until smooth. Then, beat in the buttermilk and bananas. Slowly stir in the dry ingredients into the wet until the flour is all incorporated. Pour your batter into your prepared loaf pan.
  3. For the crumble topping, combine the powdered sugar, flour, cinnamon, salt and melted butter. Using your hands (it's easiest), crumble the mixture over the batter in the pan. Bake for 45-50 minutes or until a tester inserted in the center comes out clean.
Recipe via Little Bits Of...
In Photos:


Mash those bananas!


Whisk together your flour, baking powder, baking soda, salt and cinnamon and set aside.


In your mixer, beat together your egg, sugar and vanilla.


Add in your butter and beat until smooth.


Then beat in your banana mash and buttermilk.


And, finally, slowly mix in your flour mixture.


Put that in your prepared pan. I recommend a 9 inch pan. This is an 8 inch and, well, you'll see what happened.


Mix up your crumble topping - flour, powdered sugar, cinnamon, butter, pinch of salt.


Using your hands, crumble that over the top. Bake at 350F for 45-50 minutes until a tester inserted in the center comes out clean.


Mine overflowed a bit, as you can see! If you use a larger pan, this will not be an issue. I also had to bake it for probably 60 minutes in this smaller pan as well.


 See? Whoops. Still tastes amazing despite the overflow, though!


Cut 'er up and serve!

Thursday, April 17, 2014

My Favorite Easter Appropriate Recipes

Easter is a bit of an odd duck holiday to me. I guess maybe because I'm not really religious, it's more of a holiday about food and chocolate than it is about anything else. Oh yes, and egg decorating and hunting. Don't forget the egg hunts.

Why did egg hunts become a thing for Easter?! So strange.

Anyway, because it's holiday mostly about the brunch and candy, I figured I would feature some of my favorite recipes ripe for the making this weekend. 

http://www.freshfromthe.com/2011/04/oven-chocolate-chip-easter-egg-cookies.html
You know those little chocolate eggs you can buy, with the candy shell? Yes, cookies are full of chocolate egg bits. Perfect to satisfy your sweet tooth.

Of course, if you're feeling more traditional, you can make some sugar cookies. These aren't cutout cookies, but rather a much lighter and flakier cookie. You can still add some cute sprinkles to Easter it up. Yep, using Easter as a verb now!

I've made this for a couple of Easter brunches, and it has always been a hit. Monkey bread is a pretty simple idea. Chunks of bread bits rolled in some butter and cinnamon-sugar and topped with a delicious glaze. You can't go wrong.

Challah Bread is seriously awesome. Especially when it's homemade. It can bit a bit on the labor intensive side, but the good news is, you can make this ahead if you're going to use it for french toast, because, ummm... yeah. French toast is always better with slightly stale bread, as it will soak up your milk/egg juices more.

 Another great brunch option if you want to bring something to a party pre-made. This is basically a loaf version of a cinnamon roll situation. What you'll love the most? Pulling it apart with your hands.

 I wish I had a better picture of this lovely thing, because this does not do it justice. I will make it again someday and remedy that situation. But this is great for more of an afternoon brunch. It's got a slightly dessert-feel, but there's also fruit, so you know, some health factor. This is a staple in my family for most family gatherings, and you should definitely try it if you haven't.


Thursday, October 24, 2013

Challah Bread

Challah holla!

Sorry, I had to do it. 

Challah Bread by freshfromthe.com

Did you know, I'd never had challah bread before making this homemade version? It's true. Unless I ate it unbeknownst to me at a restaurant at some point, which I suppose is entirely possible. Truth be told, I had never even heard of it until probably a few years ago. Or if I did hear it, I probably thought someone was just saying holla and didn't think twice.

Which is really sad, because ummmm.... this bread is pretty great. And I love me some bread. It's not without some work, mind you, but you'll probably be really happy you put in the time once it's done. Plus, this makes two loaves, so you'll feel really accomplished, and you can totally freeze one for later so you don't have to do it all again.


This bread is particularly great for things like french toast, which is always better with a thick bread, grilled cheese sandwiches, and even BLTs with your pieces just toasted. Tell me you don't want to take a big bite into that right there. Bacon, lettuce, tomatoes, and even some avocado too, plus homemade bread? Yes please.

I will not lie to you, though, the braiding part is kind of hard. Unless you've done it a bunch of times already, then it's probably easy peasy lemon squeezey, but I only know how to do a basic regular braid, man. I can't even do the fancy french braids the girls used to do in junior high. Or those fishtail ones? I mean, that was entirely foreign. Ah, the days when we'd braid our hair during leadership class... good times, good times.

Challah Bread by freshfromthe.com

The classic braided Challah Bread, great for French toast, sandwiches, and just to eat with some butter slathered on!

Ingredients:
  • 1 ½ packages active dry yeast
  • 1 Tablespoon plus ½ cup granulated sugar
  • 1 ¾ cups lukewarm water
  • 1/2 cup olive oil (or vegetable oil)
  • 5 large eggs
  • 1 Tablespoon salt
  • 8 to 8 ½ cups all-purpose flour
Instructions:


  1. In a large bowl, dissolve the yeast and the 1 tablespoon of sugar in 1 3/4 cups lukewarm water. Not too hot, not too cold. As Goldilocks would say, juuuuust right. Let that sit for about 5 minutes to get activated and frothy.
  2. Whisk the oil into the yeast mixture, then beat in 4 of the eggs, one at a time, with the 1/2 cup remaining sugar and the salt. Gradually add in the flour, one cup at a time. When the dough holds together, it is ready for some hand kneading. You can use a mixer with a dough hook if you want, but not if you have the basic Kitchenaid like me. Doing too much dough hooking will kill your motor. Truth.
  3. Turn the dough onto a floured surface and knead until smooth and elastic. Either clean out your bowl from earlier or get another big one and grease it up. Return your dough to the bowl, greasing both sides of the dough. Cover with plastic wrap and let rise in a warm place for an hour, until almost doubled in size. Your warm place can be an oven that was heated to 150F and then turned off before you stick the dough in. After the hour has passed, punch down the dough and let rise again in that warm place for another half hour.
  4. Now it's time to form the braids. Honestly, I don't have good directions for the braiding. The ones I read were confusing, and we kind of just made it up as we went. Basically, you split your dough in half, then from that half make 6 balls the same size. Roll those balls into strands about 12 inches long and 1 1/2 inches wide. Place them in a row next to each other, pinch the tops together, then... braid. You can try following these directions. After you've got your braid, pinch the bottom ends together. Repeat with your second half. You can also turn it into a circle if you prefer.
  5. Place the loaves on a greased cookie sheet about two inches apart. Beat your 1 leftover egg and brush it on the loaves. Let rise another hour, and keep that egg for after the hour.
  6. Preheat the oven to 375°F and brush your loaves again with the egg after the hour has passed. At this point you can sprinkle with poppyseeds if you so desire. Bake in the middle of the oven for 30-40 minutes, until golden. If you have a fancy thermometer, the insides should be 190°F. Cool the loaves on a rack, then get to slicing!

Recipe via Smitten Kitchen

In Pictures:


 Yeast and 1 Tbsp sugar go into lukewarm water, then you whisk in 4 of your eggs and the other 1/2 cup sugar. It's very liquidy. It's fine.


Start mixing in your flour, 1 cup at a time. You'll be like oh man, there are some lumps of flour in that liquid. It's okay. They'll go away.


Keep going. You can do it! Forearm strength!


See? It can be done. It's now ready to be kneaded.


Plop!


Knead it, baby! Those aren't my hands, btw, those are boyfriend hands. We switched it up and I took most of the pictures this time, while he did a lot of the mixing and kneading and braiding!


Grease your bowl, cover it with plastic wrap, let it rise in a warm place for an hour until about doubled.


It. Shall. Rise!


Everyone's favorite part - the punch!


Wa-pow! Once you've punched it down, put the wrap back on and back in the warm place for another half hour.


It will rise again!


Take half the dough, and split that half into six balls.


Turn those balls into strands.


And braid those bits together.


Repeat with the other half. Put on a greased cookie sheet and brush with your last egg. Let rise for another hour. Preheat your oven to 375F.


After that hour, brush again with the egg. Then stick that in the oven for 30-40 minutes until golden.

Challah Bread by freshfromthe.com

Golden and delicious! Let it cool!

Challah Bread by freshfromthe.com

Then slice into it! Make some french toast. Make a BLT. Just eat it straight from the loaf. Enjoy!